To
build the six plant Ebb & Flow (Flood and drain) Hydroponic system,
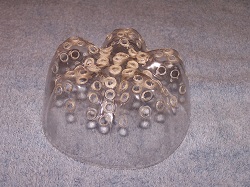
first cut off the bottoms of the 2 liter bottles. Then make a bunch of
drain holes in the bottoms you cut off.
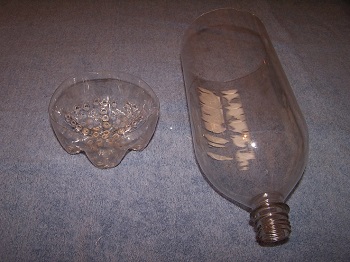
You
can drill the holes, but it might be easier to use a hot metal poker to
melt the holes in the plastic. The small plastic bottoms can be hard to
hold in place when drilling because the drill bits can get stuck on the
plastic at times. Now flip the bottoms upside down, and slide them down
into the bottles. This is basically your screen, that what will keep
the growing media from going down the neck of the bottle and into the
PVC tubing. There is no need to glue them in place.
Now
grind off enough of the threads from the neck of the bottle so they fit
inside the ¾ inch straight PVC tubing connectors. Once they fit inside,
then glue them in place using the epoxy glue or hot glue. Try and make
them as straight as you can so the bottles point straight up (it looks
better when they are all straight).
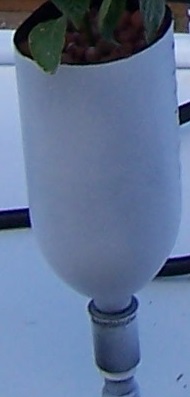
Once
the glue is dried/cured. Wad up a piece of paper towel and stick it in
the opening of the PVC connector glued to the bottles, that way paint
wont get inside the connector. Then place the bottles neck up on a
newspaper and paint them with the black paint. The black paint will
block light and keep algae from growing inside the bottles. Once the
black paint dries, paint them again with the white paint. The white
paint will reflect light and help keep the bottles from absorbing heat.
Plus it looks better than black. Make sure to only paint the outside of
the bottles. The picture to the left is of a finished painted bottle
that is already installed in the hydroponic system.
Building the hydroponic system base
Building
the base of the six plant system is very easy to do, all you need is a
hacksaw to cut the tubing, and a sharp blade knife to scrape the burs
off of the cut pieces after you cut them. A tape measure to make sure
all the pieces you cut are the length you want them to be, and PVC glue
to glue all the pieces together when done. But make sure you don't glue
anything together until you have all the pieces cut and everything dry
fitted together first. That way if you need to make changes, you don't
need to start over. Once you glue it, it wont come apart again.
The
exact size you cut your pieces isn’t really that important, you mainly
just want to make sure the pieces that are supposed to be the same size
as the ones on the other side, are the same. Otherwise it wont look
right. Also your spacing will mainly be dependent on how big the plants
you place in it will get when their full grown. If you space them to
close together the plants will become crowded when they get big, and if
you space them too far apart you wont be able to get as many plants in
the space you have available.
As an example: if the plants you
are growing are expected to get 2 feet wide when full size (one foot on
either side), you want to make sure you space them about 2 feet apart.
One foot for that plant, and one foot for the plant next to it, that
makes 2 feet of space you need between them. If you spaced them 4 feet
apart, you could have had twice as many plants in the space. And if you
space them only one foot apart, they would become crowded before they
reached full size. I expected my plants to get about 2 feet wide, so I
spaced them with that in mind, but your spacing may vary. Just make
sure you cut your pieces so everything is even if you want different
spacing. The drawings aren’t exactly to scale, but you'll get the idea.
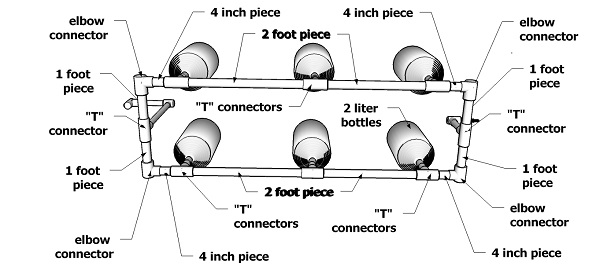
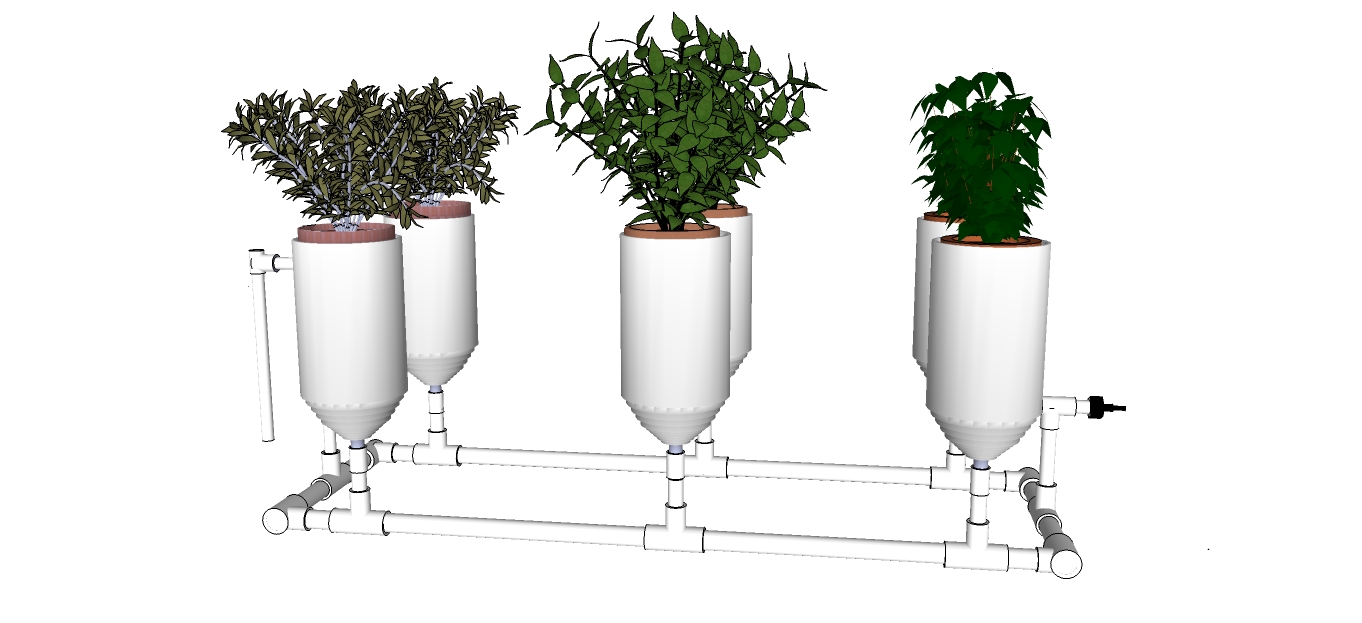
The
image below is a top view of the base of the hydroponic system. Notice
The short pieces of ¾ inch PVC tubing pointing straight up from each of
the “T” connectors where each of the six 2 liter bottles will be
placed. Make sure these pieces aren’t too long or the 2 liter
bottles can become a bit tipsy. Two to three inches should be fine, and
again make sure to dry fit everything together first before gluing them
together.
Also notice the “T” connector for
the overflow tube is opposite the side where the barbed ½ inch
connector for the flood line from the pump is located. In order
for the water to flow properly, you want the water to fill from one
side of the system, and return from the other side. So it flows all the
way across.
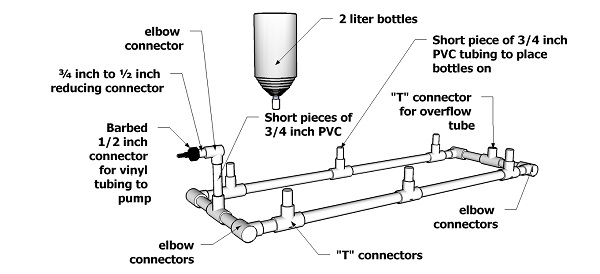
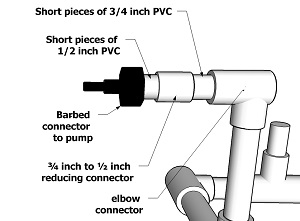
The
threaded and barbed connector for the vinyl tubing fits ½ inch tubing.
So you need a ¾ inch to ½ inch tubing connector to connect them. You
need a short piece of PVC on both sides of the connector to connect it
to the other fittings. The barbed connector connects to the ½ inch PVC
tubing. But the PVC tubing is not threaded. Not shown in the picture is
another connector that is needed. It slips on the ½ inch PVC tubing,
and is threaded on the other end. Then the barbed connector just screws
onto it.
Now you can put the 2 liter bottles in place on the
hydroponic system base. Don't glue them on, just press them on snugly.
You will want them removable later for maintenance, as well as for
easier cleaning when your ready to clean out the system to get ready
for the next grow. No mater what you do the roots will wind up
growing down into the tubing, and when there is enough of them they can
clog the tubing.

That's
when you'll want to be able to remove the bottles and cut the roots off
that are clogging it. There will be a little dripping from this
connection initially (because it isn’t glued). But it will slowly stop
as the mineral salts in the nutrients build up and clog the drips.
Now
that you have the 2 liter bottles in place, you can construct the
overflow side. You want the bottles in place so you know how high to
make the overflow tube. The height of this tube determines the water
height in the 2 liter bottles.
You want the water level in the 2
liter bottles to be about 2 inches below the top of the growing media
inside the bottles. That will provide plenty of moisture for the roots
below, as well as prevent your plants from developing stem rot from
excess moisture on the main stem of the plant. Now that you have the 6
plant flood and drain hydroponic system all built and dry fit together.
Go ahead and glue all the PVC connections except where the 2 liter bottles connect to the system.
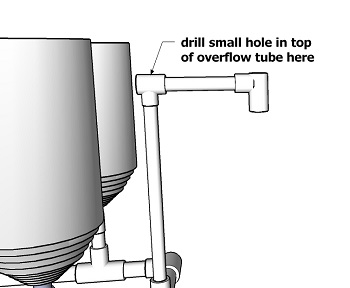
Air
pockets that get in the system can do some strange things like having
some of the bottles not fill with water, while the rest are flooding
just fine. This problem is easy to fix Just drill a small hole or two
in the top of the overflow tube. Make sure it is at the very top, so
you don't have water continually flowing out of this hole. You want it
above the path the water takes back to the reservoir. You will have
some water drops occasionally drip out of this hole, but if placed
right, that should be very little.
If you want to eliminate
any drips coming from the drill hole, you can change the configuration
of the overflow tube, and raise the drill holes
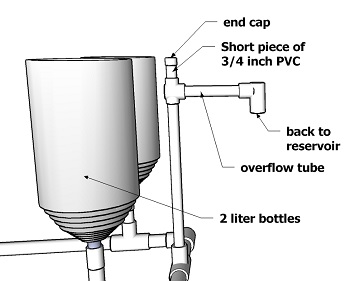
farther above the water flow. If you replace the elbow connector with a
“T” connector, then insert a small piece of tubing in the top of the
“T” connector, that will raise it even farther above the water flow.
Then just place a end cap at the top, and drill your small holes
in the end cap.
Now that you have your hydroponic system
built, all that is left is to set up your reservoir, and attach your
pump. The easiest place to put the reservoir is straight below the
overflow tube. Just line it up and make a small hole in the lid where
the overflow tube will go through.
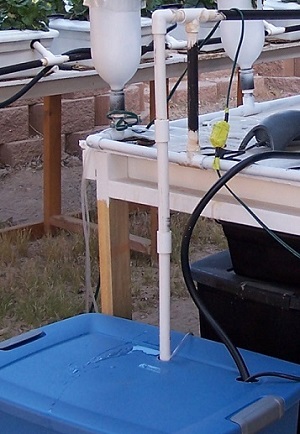
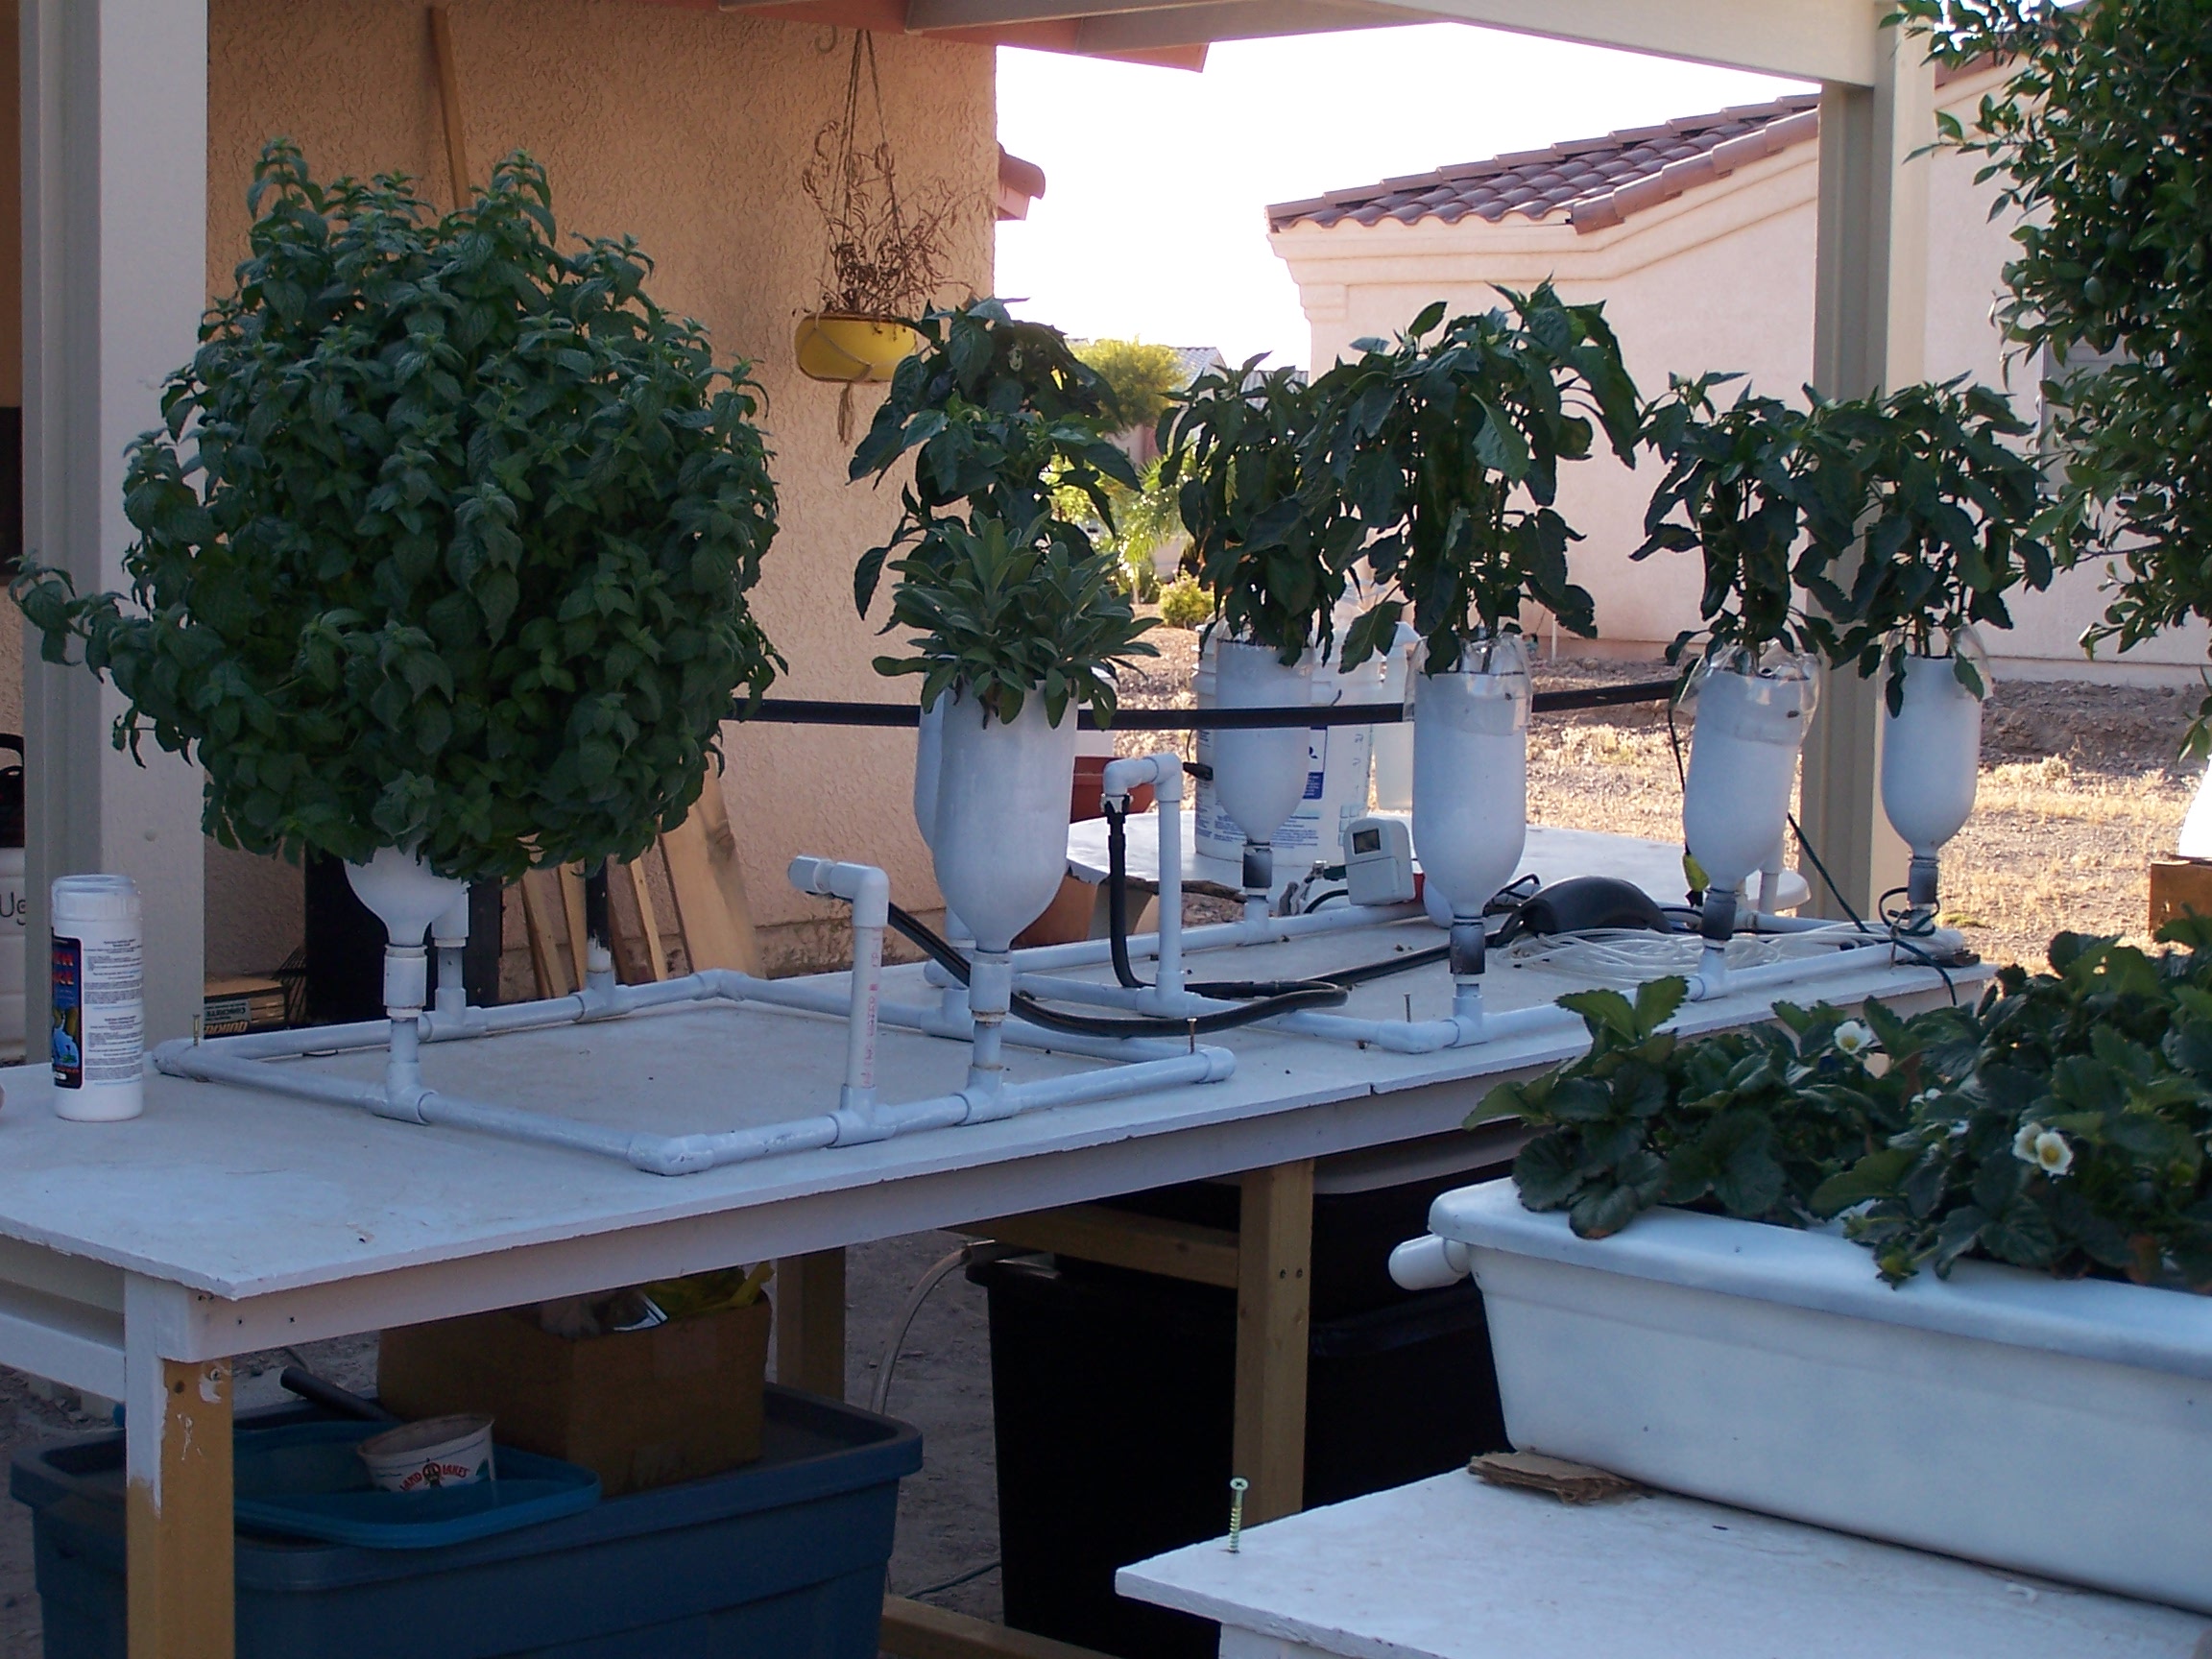
The
picture to the left shows the overflow tube going straight down into
the reservoir. The reservoir in the picture hasn’t been painted yet.
But like you did with the 2 liter bottles, you'll want to paint the
outside of your reservoir black to light proof it, then white to
reflect light.
You can also see the another hole in the lid
where the black vinyl tubing from the pump is coming out. Also coming
out of that same hole is the cord for the plug from the pump. The small
clear tubing coming out of hole where the overflow tube is going in, is
the air line tubing from the air pump. And it is connected to the air
stone inside the reservoir.
In the picture the overflow tube
looks like it is coming from two places. It is, that system was two
systems in one. One 6 plant system just like in these directions, as
well as another smaller 4 plant system connected in series. So the tube
coming up to the overflow is from the 6 plant system, and the tube
coming straight across to the overflow is coming from the smaller 4
plant system. These directions are for just the one 6 plant system, so
you wont have the other overflow coming across from the other system.
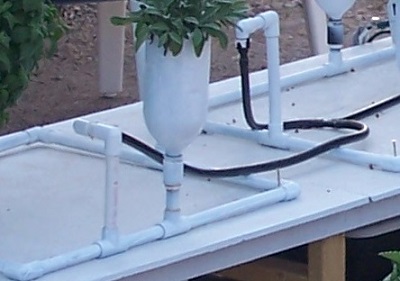
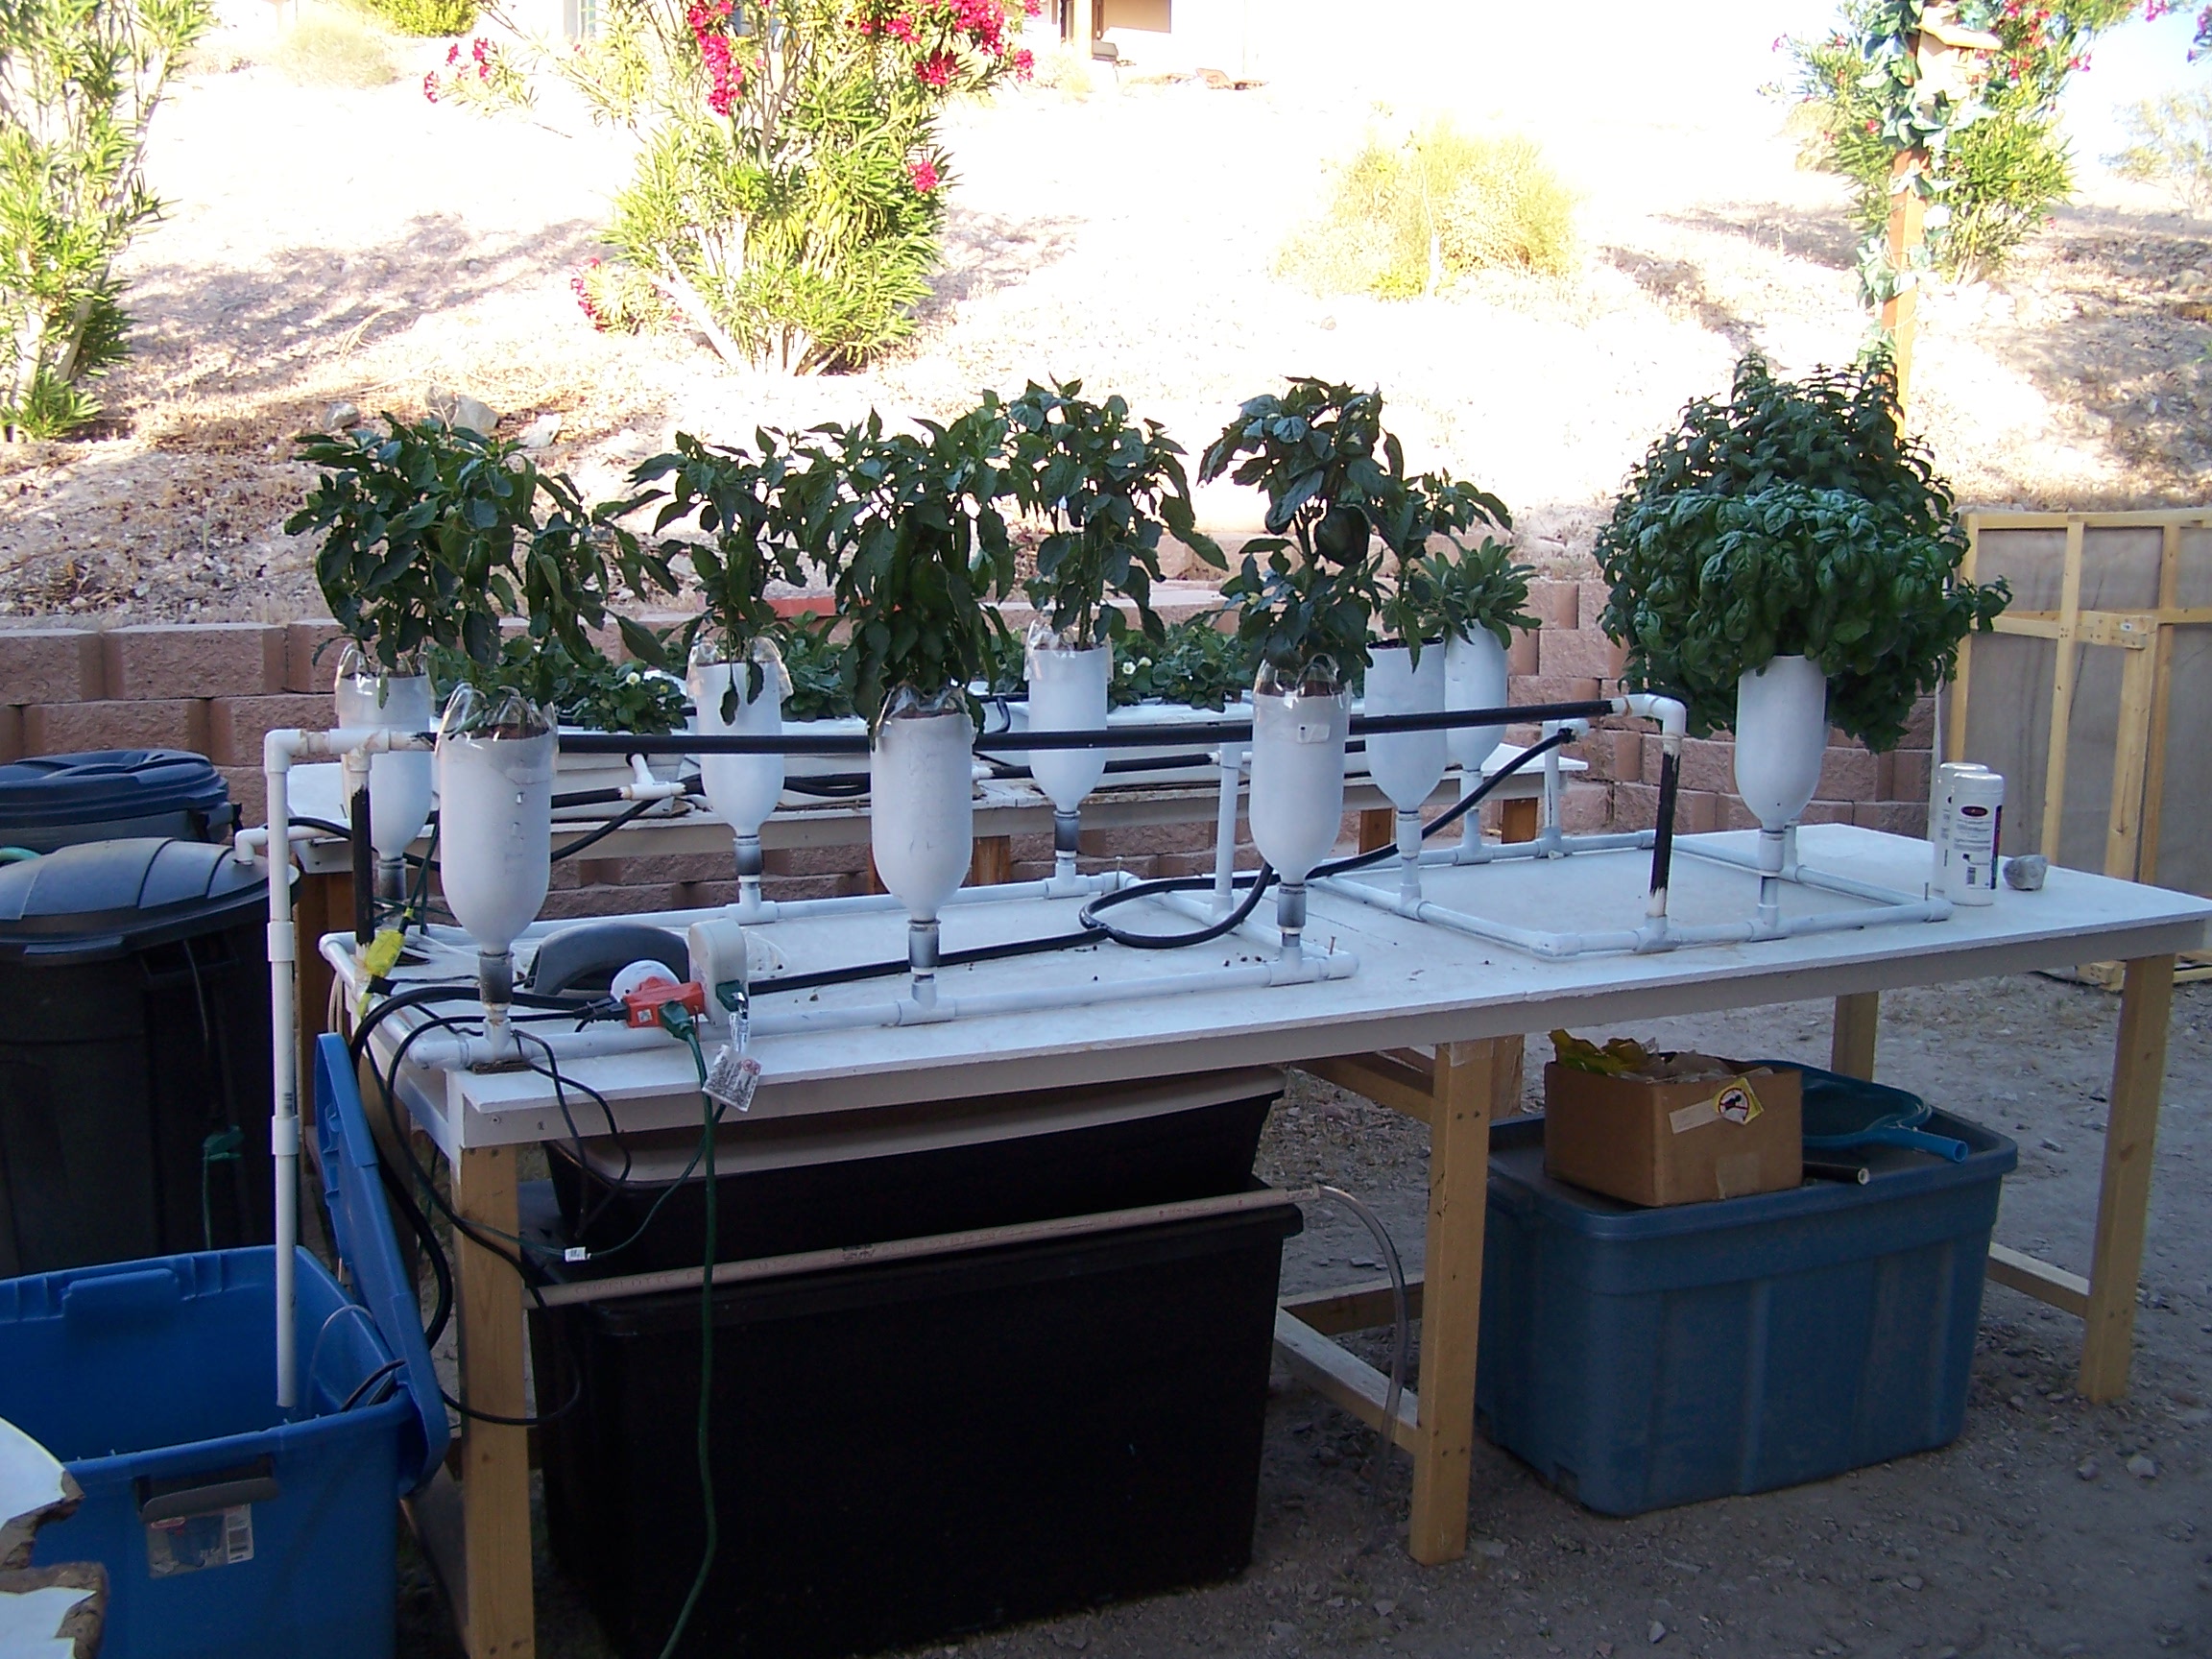
In
the picture to the right, you can see the black vinyl tubing coming
from the pump in the reservoir being split into two lines, and
connecting to the barbed connector to both systems (the 6 plant system
as well as the smaller 4 plant system). Now your all done building your
6 plant Ebb & Flow (Flood & Drain) hydroponic system. All you
have left to do is grow your plants in it.
Happy Gardening!!!